
There is a lot to do in 168澳洲幸运5开奖网:Like a Dragon: Infinite Wealth's Dondoko Island, and you may get confused by the sheer number of options at your disposal. Th﷽is freedom of choice is only increased exponentially when you unlock Dondoko Farm and its su🍃rrounding island.

Like ♐A Dragon: Infinite Wealth - How To Increase The Selling Price Of Dondo🎃ko Island Specialties
Here's how♐ to increase the selling price of specialties on Dondoko Island in Like a Dragon: Infinite Wealth.
Once you've gotten to the three-star resort rank, you'll be able to begin freely traveling to the farm and use its services whenever you'd like, barring any threats. It's a great service to your efforts to improve Dondoko Islaღnd, with options to earn Dondokobucks, collect ingredients, or find rare fish and bugs to complete guest requests.
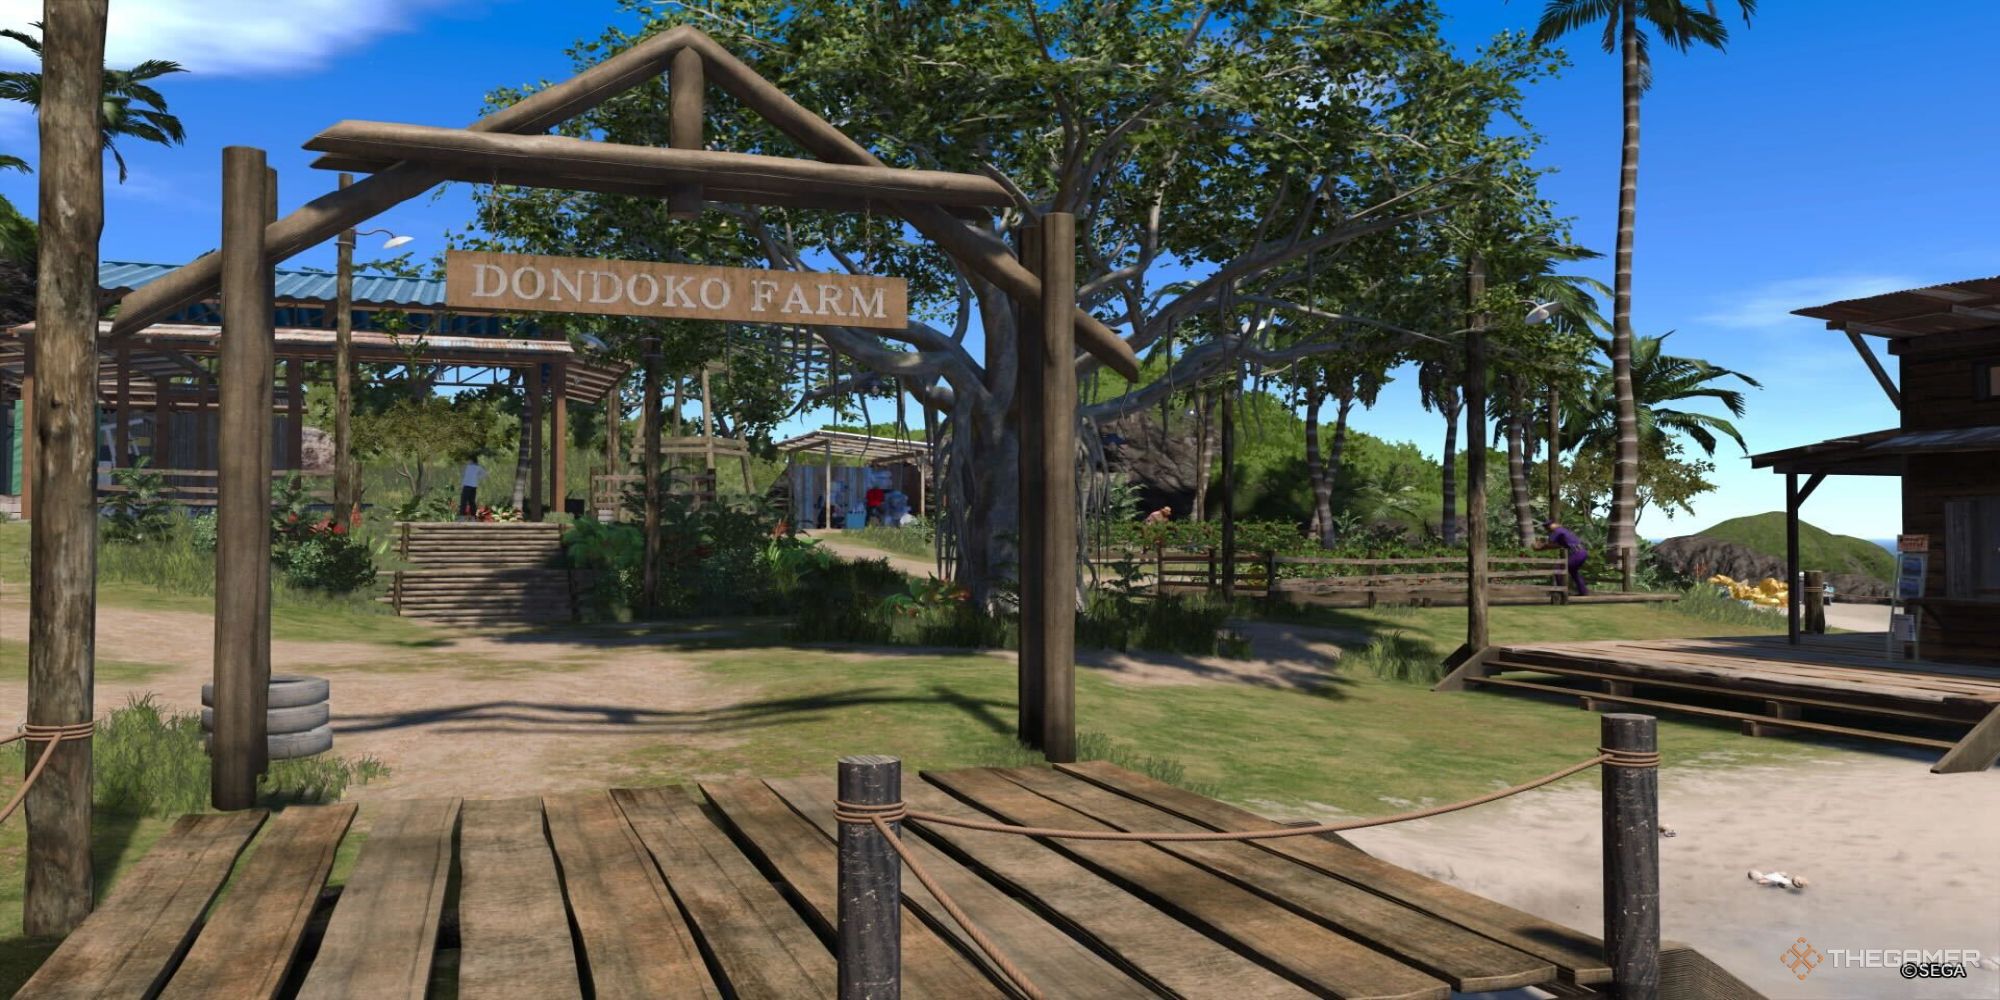
How To Unlock Dondoko Farm

Dondoko Farm is one of the rewards you'll receive once you've upgraded your resort to level three and then progressed to the next day. You'll be introduced to the farm's two caretakers, and you'll be given an overall explanation of the new island. From then on, you can travel to Dondoko Farm using the raft with a flag on the north beach.
In addition to being a great place to find collections of rare plants and animals, you'll also use this island with your Sujimon. The Dondoko Farm is a great way to train and grow your Sujimon using the following methods:
- Workshop
- Crop Patches
- Recycling Center
- Training Spot
Each of these locations provides different benefits for your Sujimon and for you too. While some will be great for helping to increase your supply of materials, others will directly pay out Dondobucks that can be used to further improve your island.
These tasks only progress while you're playing Dondoko Island and don't continue to count down once you go offline or in other modes.
When assigning Sujimon to any of these areas, be aware that it will take real-life time inside Dondoko Island for them to complete the tasks. Unlocking the farm earlier in your playthrough can help ensure that your Sujimon can work while you repair the resort in the background.
After you've further progressed to your resort and Dondoko Farm, the latter will begin being attacked by groups of animals. You'll need to use your Sujimon to fight them off, with your standard roster serving as your l🌱ine-up to do so.
Workshop
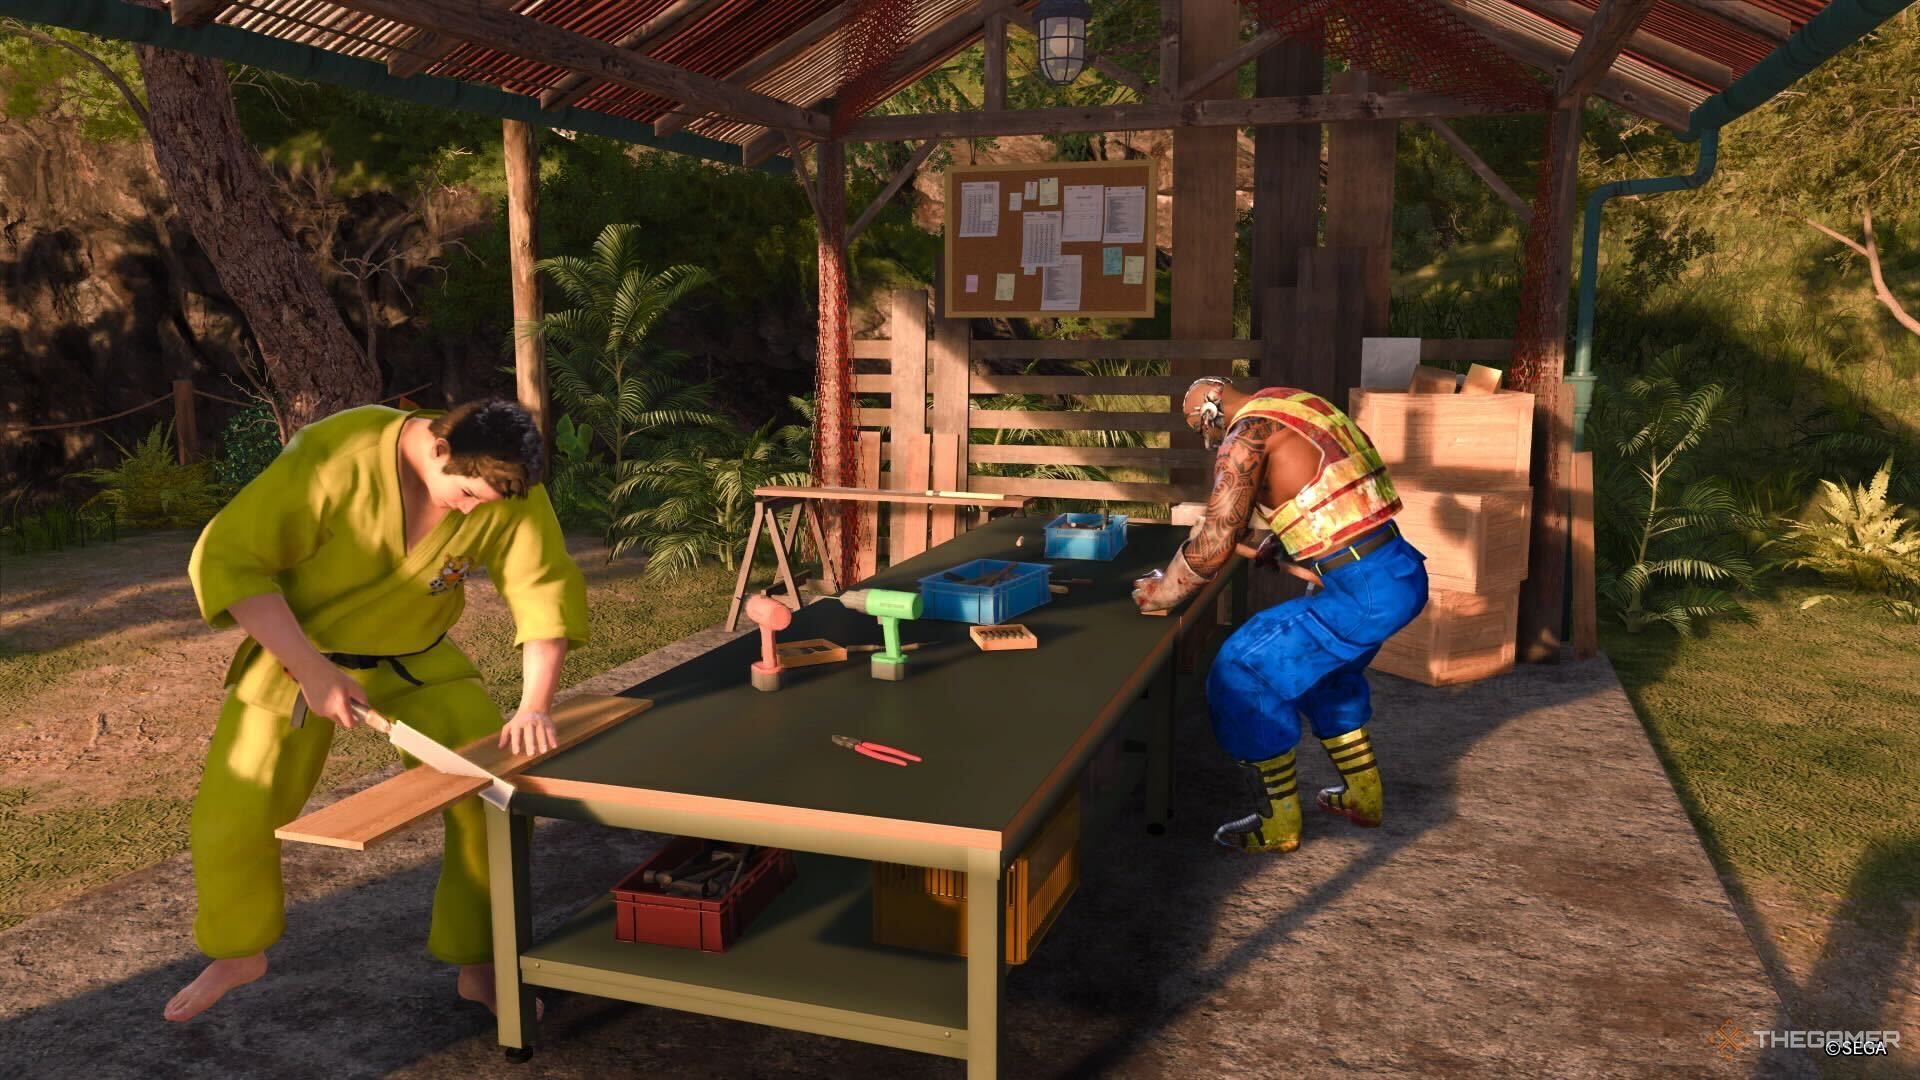
By assigning up to three Sujimon to the Workshop, you'll be able to earn a chunk of income once they've completed the assigned task. As with the other stations, these range in time, with the more expensive tasks rewarding the player with more Dondokobucks.
Sujimon of the same type as the task have a better chance of earning additional reward𝔉s.
The Worksho💛𒊎p's tasks, time limits, rewards, and more can be broken down as follows.
|
Task Name |
Task Type |
Task Duration |
Reward in Dondokobucks |
|---|---|---|---|
|
Lickety Split |
Blaze |
10 minutes |
25,000 |
|
Hyperfocused |
Frost |
20 minutes |
45,000 |
|
Slow & Steady |
Nature |
30 minutes |
100,000 |
|
Mastercrafting |
Light |
60 minutes |
300,000 |
When assigning a new job to your Sujimon at the workstation, you'll see a meter that shows the chance for 'Huge Gains' at the bottom. If successful, you may see an additional bonus added to what you've already earned.
Crop Patches

Similar to the Workstation, the Crop Patches can be worked by up to three Sujimon for a certain amount of time. However, you'll need to decide which crops and Sujimon work together if you want to optimize how much you're growing each time.
You'll need to set a duration for your plants, choose which crops to grow, and finally pick which Sujimon will do the tending. Keep in mind that crops can be used for souvenirs, which means you should always have a decent stock to draw from.
|
Task Name |
Task Duration |
Base Crop Yield |
|---|---|---|
|
Greenhorn Gardening |
10 minutes |
Four to 12 per crop |
|
Casual Cultivation |
20 minutes |
Eight to 24 per crop |
|
Aggressive Agriculture |
30 minutes |
12 to 36 per crop |
|
Dondoko A-Grow-Gro |
60 minutes |
24 to 72 per crop |
Each crop will have its own yield, with some minor overlap, so ensuring you're getting enough crops may mean waiting for some of the higher tiers of gardening tasks.
|
Plant Name |
Element Type |
|---|---|
|
Tomato |
Blaze |
|
Potato |
Nature |
|
Onion |
Nature |
|
Daikon |
Frost |
|
Carrot |
Nature |
|
Garlic |
Light |
|
Hot Pepper |
Blaze |
|
Dondoko Nut |
Shadow |
|
Dondoko Herb |
Nature |
If you're able to focus on one plant at a time and use high-level Sujimon of that same type to tend to the fields, then you're likely to have a full harvest every time you return to your Crop Patches.
Recycling Center
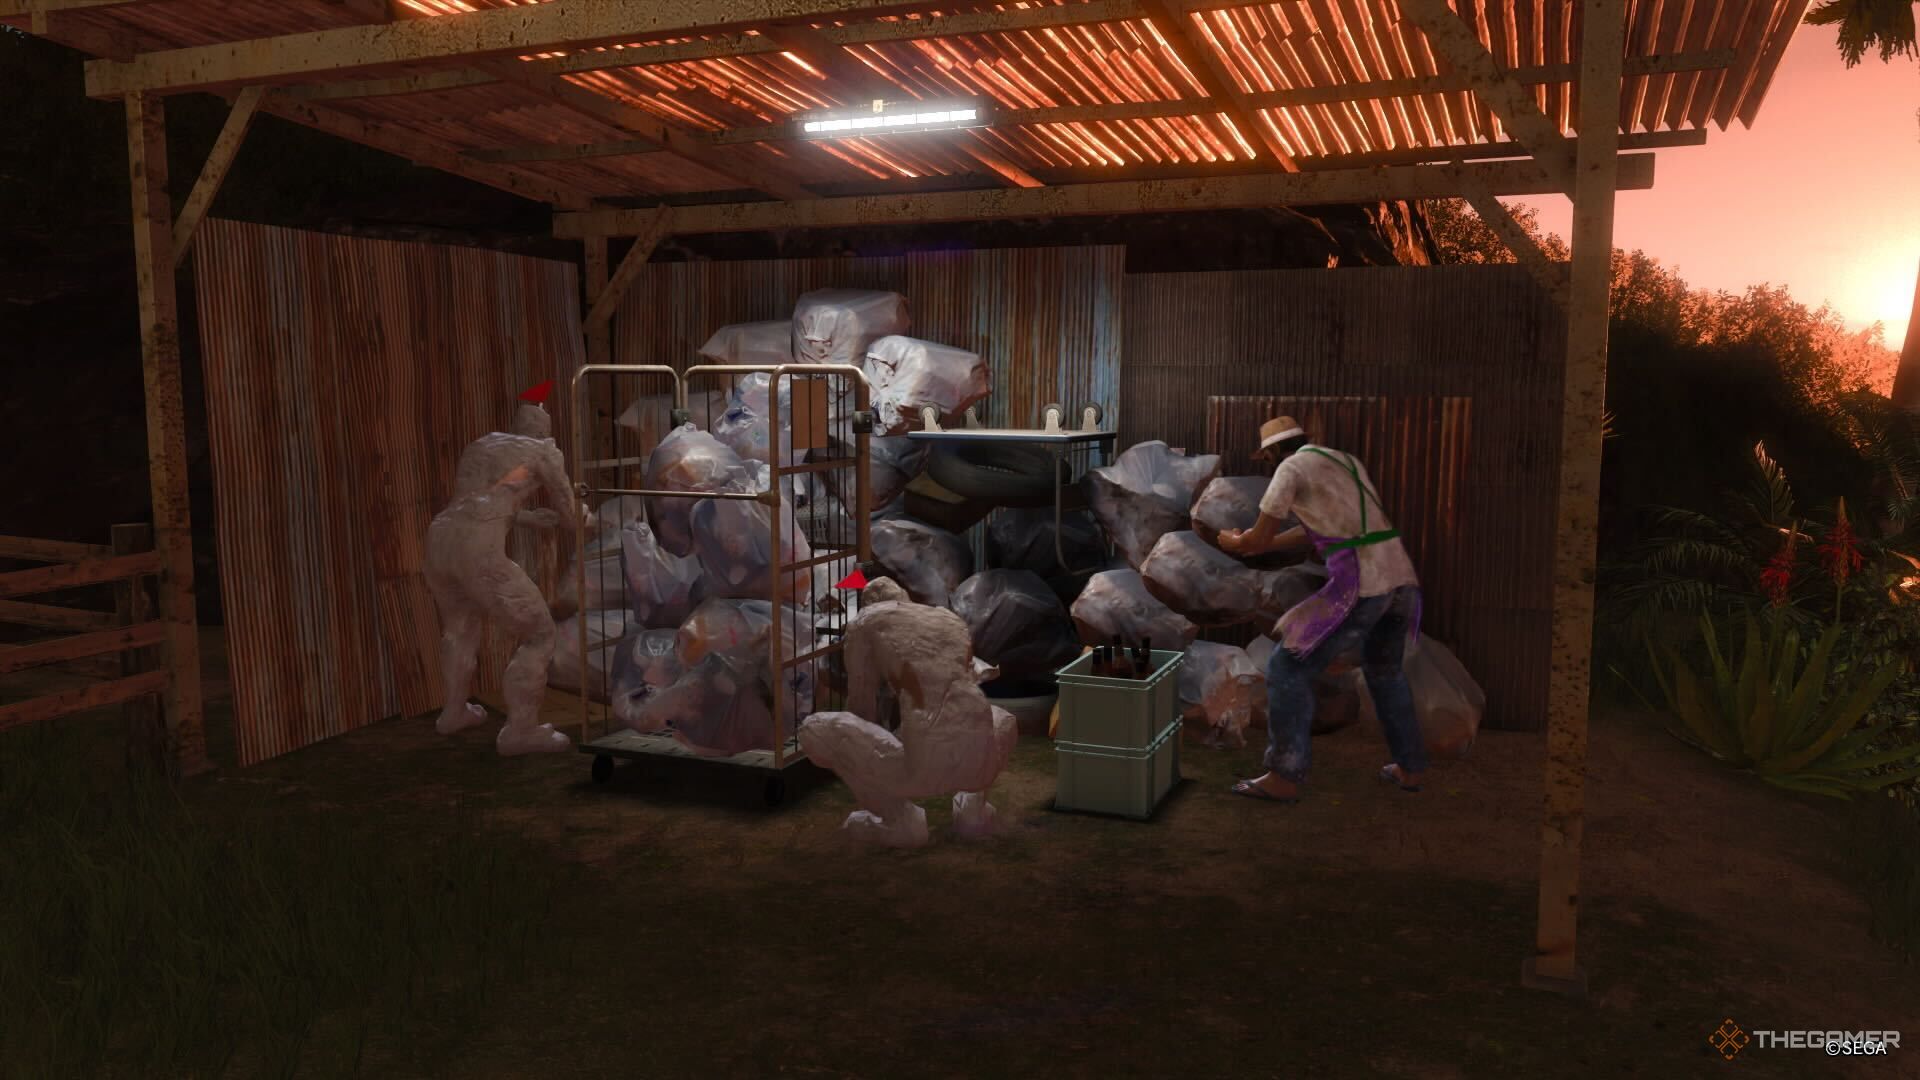
If you're trying to meet the 'Dondoko Dailies' missions every day, you'll likely run out of resources quickly. To alleviate this, the Dondoko Farm offers the Recycling Center as another way to create materials that you can then use to make further DIY items.
Multiple tasks can be assigned, which take varying amounts of time and rely on different types of Sujimon. Depending on the task, only certain resources will be collected. Larger collections of items have a chance to give more, but take a longer amount of time.
|
Task Name |
Task Type |
Task Duration |
Expected Gain |
Items Produced |
|---|---|---|---|---|
|
Insane Incineration |
Blaze |
10 minutes |
50 |
Cloth, Wood |
|
Refuse, Reuse |
Light |
20 minutes |
100 |
Plastic, Metal, Glass, Tech, Stone |
|
Semiconductor Salvage |
Darkness |
30 minutes |
200 |
Tech |
|
Mounds o' Materials |
Frost |
40 minutes |
300 |
Cloth, Plastic, Metal, Glass, Tech, Wood, Stone |
|
Natural Goods |
Nature |
30 minutes |
250 |
Wood, Stone |
As with other tasks, assigning Sujimon of the same type and a higher level will give 🌼you a better chance o🃏f earning additional resources.
Training Spot
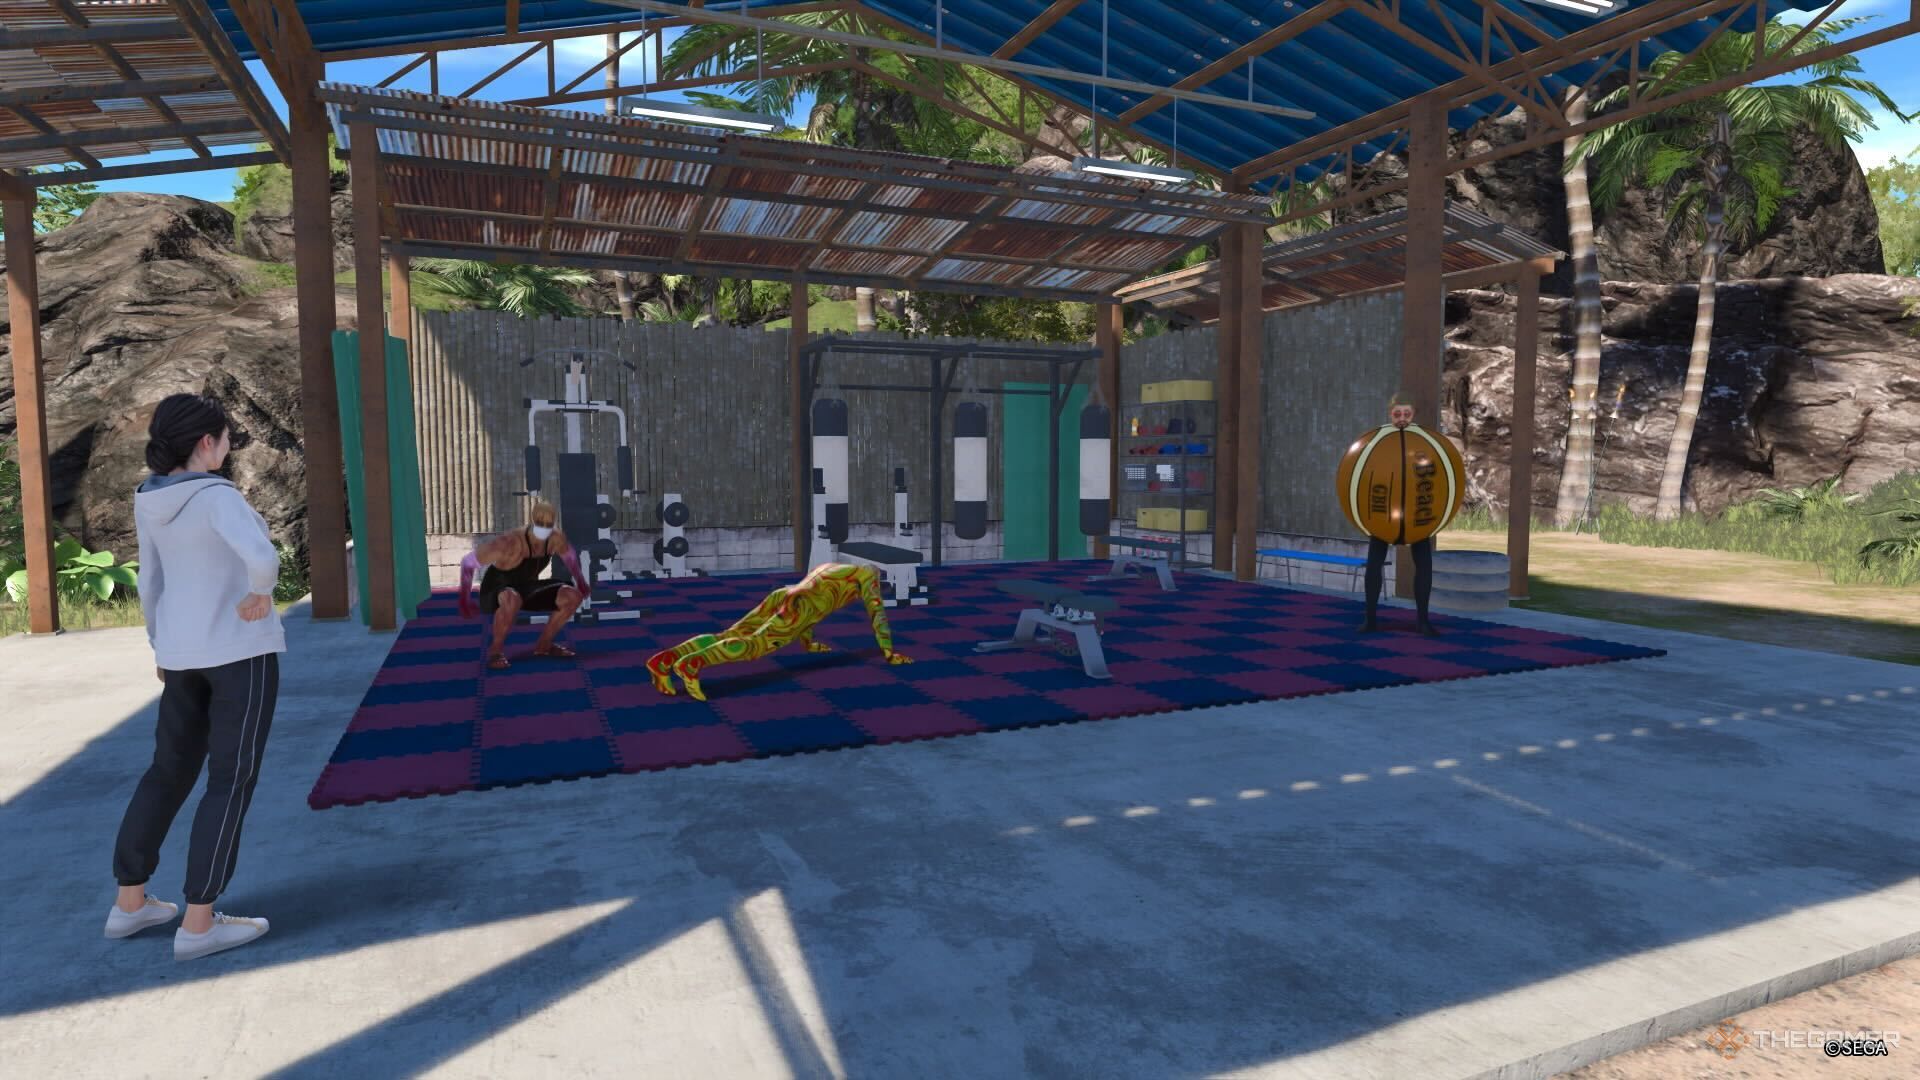
If you've got Sujimon that you want to prepare for battle or just to become better workers on Dondoko Farm, you can choose one of the training regiments and assign up to three Sujimon to train with Yui. Unlike the other options on Dondoko Farm, there are no Task-type specialties in each course.
Since there are no Task Types, you can mix whatever Sujimon needs training from your Roster.
That being said, you will need to pay for Yui's time in each of the courses, with more experience in sessions taking longer and costing more.
|
Training |
Task Duration |
Cost in Dondokobucks |
Experience Earned |
|---|---|---|---|
|
Beginner |
10 minutes |
800 |
100 |
|
Intermediate |
20 minutes |
4,000 |
500 |
|
Advanced |
30 minutes |
15,000 |
2000 |
This can be a great way to train your Sujimon that you don't use as much, while also making th𓂃em more effective in battle and on Dondoko Farm.
Interact With Your Sujimon

You can directly interact with your six active Sujimon that are on your roster near the picnic table and volleyball court, where they'll be standing around in groups of three when there are no active an🅠imal groups tꦇhreatening the farm.
Any groups of animals that attack your farm will cease all production until ꦏdealt with, so it's wise to take care of them quickly.
When walking around the island, you have two ways you can interact with your Sujimon per day: emoting near them or petting them. Doing the latter will give them a better friendship boost.
Petting them multiple times will give more hearts, signifying that you've reached the maximum amount of friendship gain that you can receive that day from that Sujimon.

Like 💟A Dragon: Infinite Wealth - Dondoko Island Dokopedia Fish Guide
Here's ဣevery fish you can catch on Dondoko Island in Like a Dragon: Infinite Wealth and whe🍃re to find it.